Shared Data Area
Shared area (shared data area) refers to the shared directory where users' shared data is mapped on the remote server; through shared group management, you can create shared groups, add and modify group members, and view the shared groups that you have created and those that you have participated in, in order to achieve the sharing of users' file resources in the group.
Adding a Shared Group
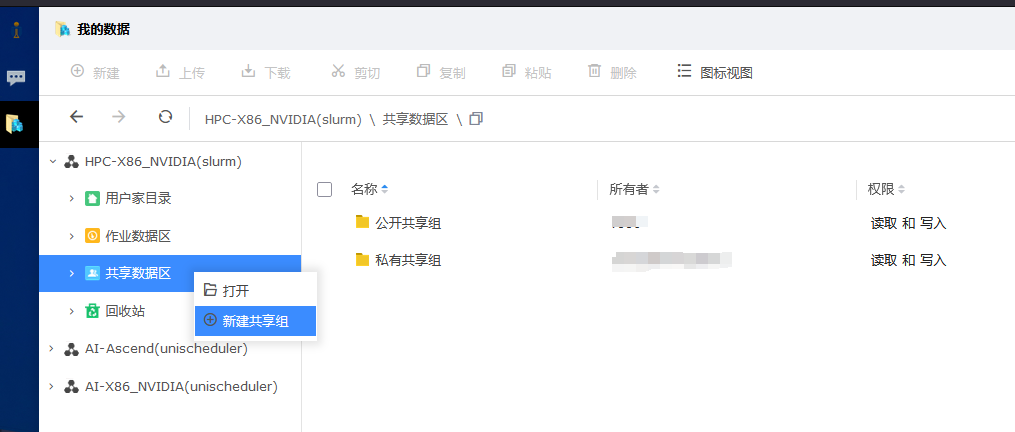
- Select the shared data area, click the right mouse button --- create a new shared group.
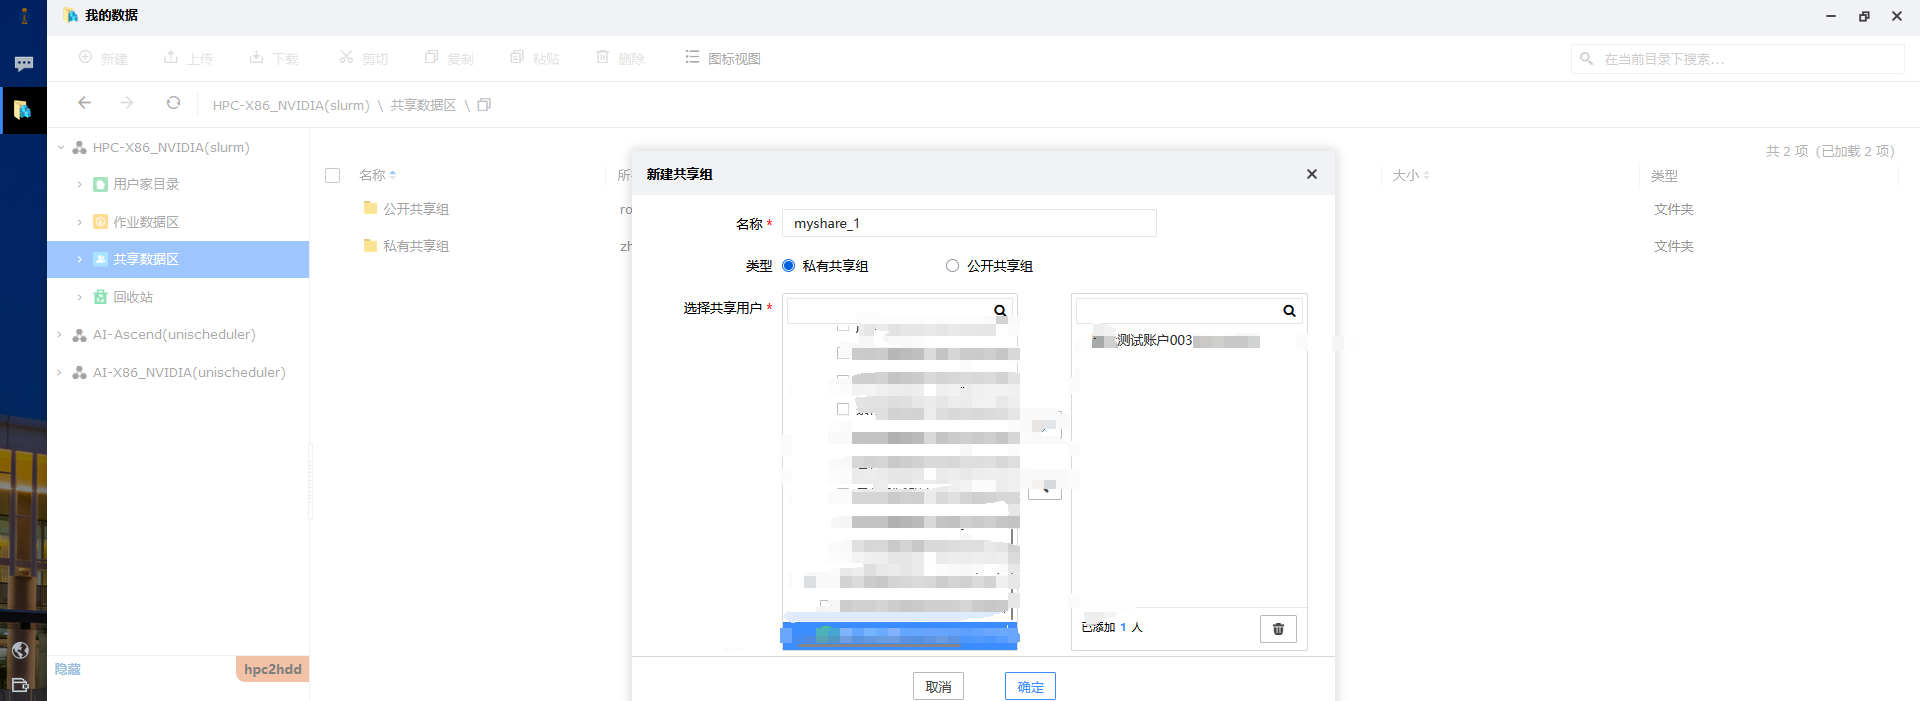
Enter the name of the sharing group, select the sharing account, and click the ">" button to add the sharing account.
Create the new shared group
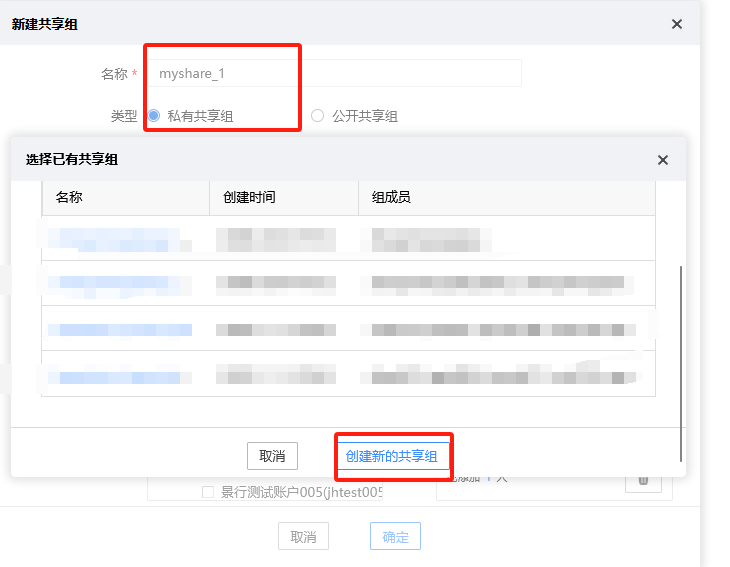
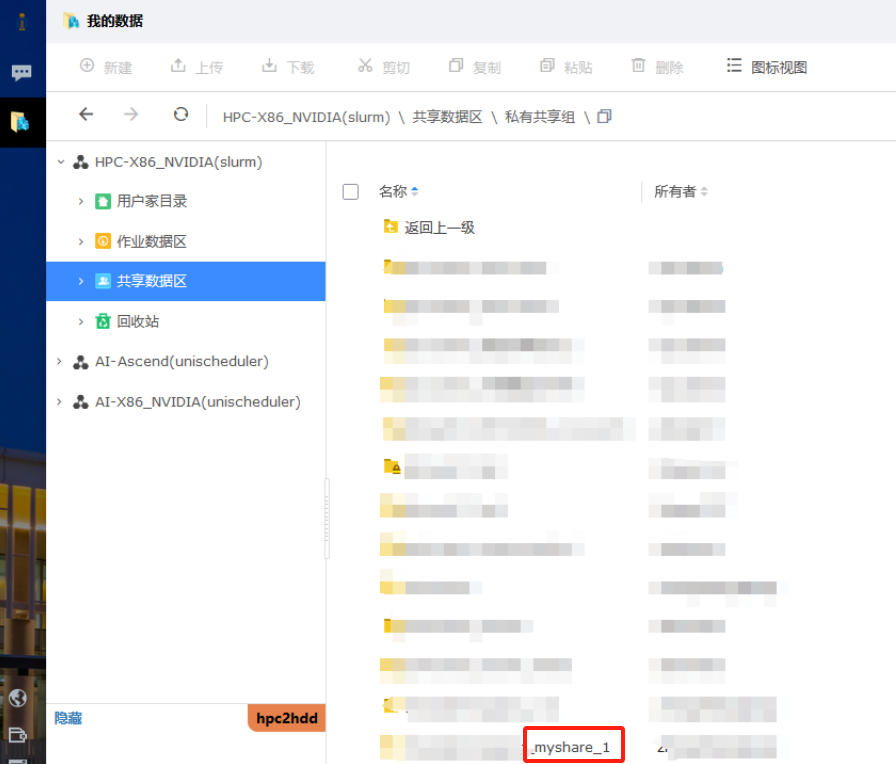
Modify the sharing group
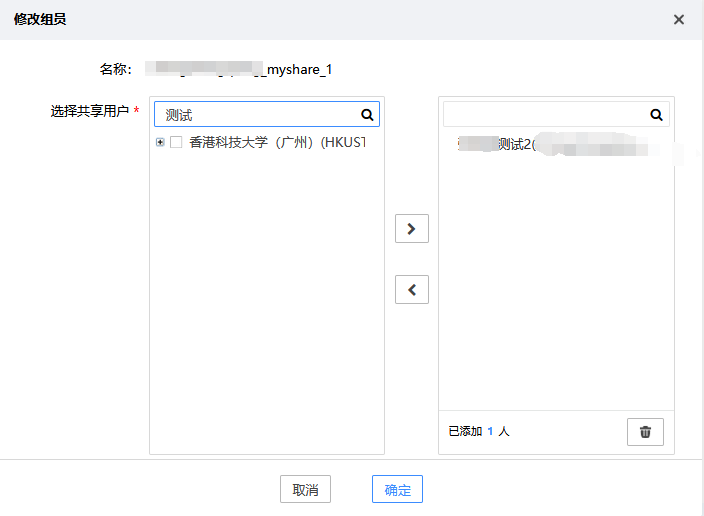
After adding group members to a private shared group, you need to set permissions for the first-level directory under the shared group (you need to check the Recursive Settings option to set permissions for sub-subdirectory traversal).
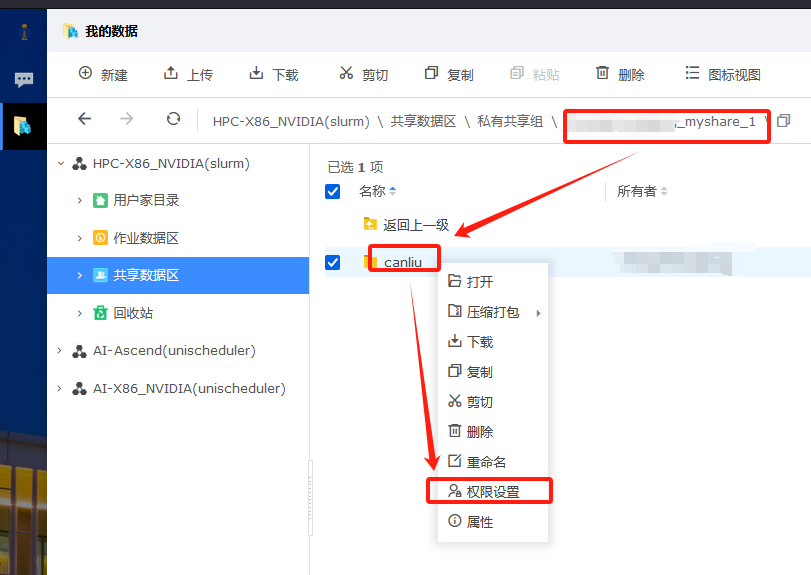
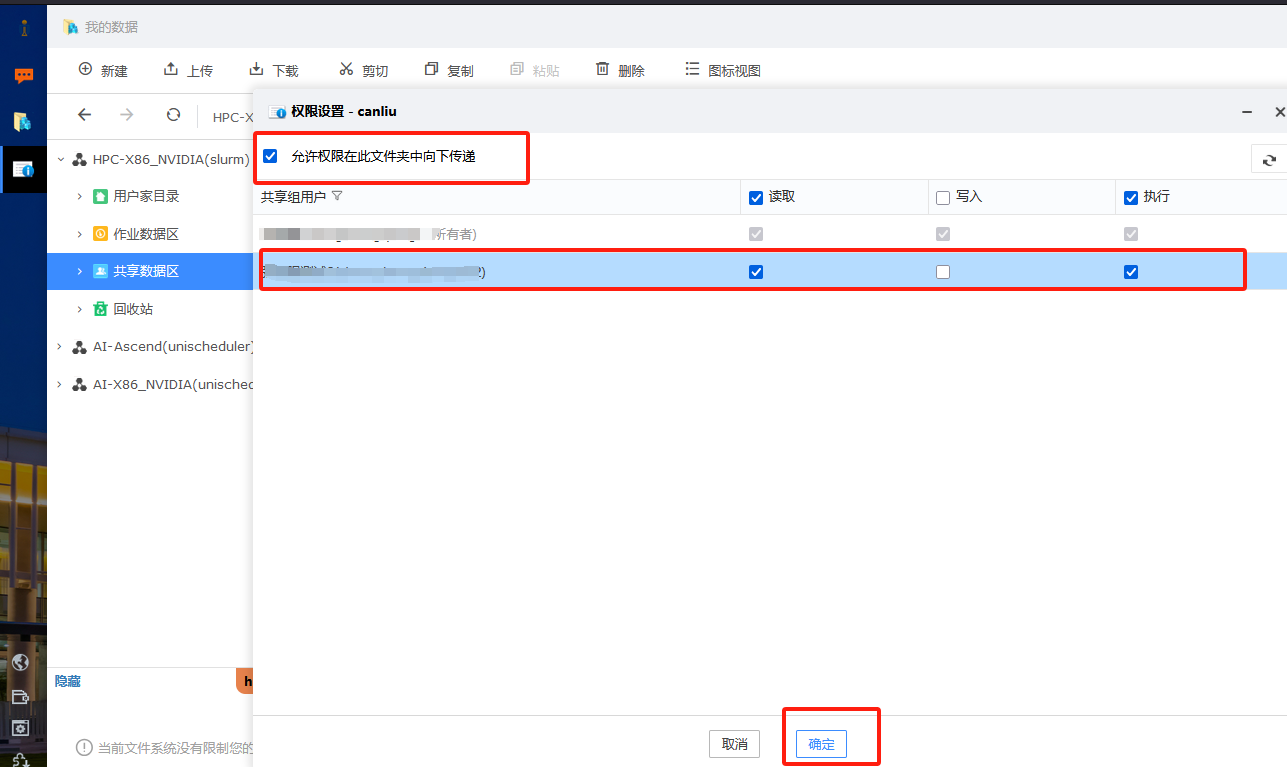
File Sharing
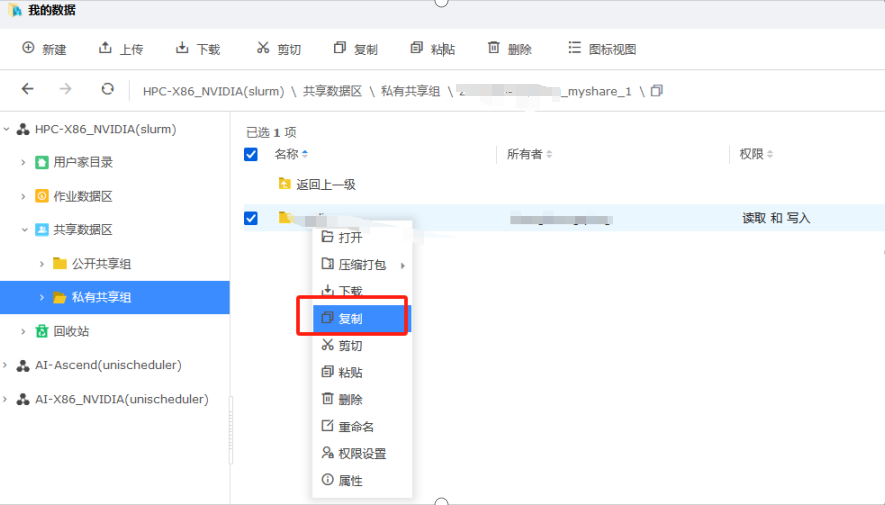
Select the file or folder to be shared ----- select the copy button
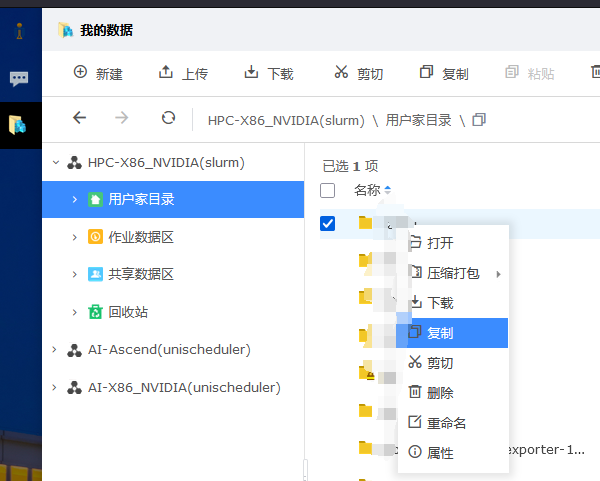
Go to the shared folder pinch and click the paste button
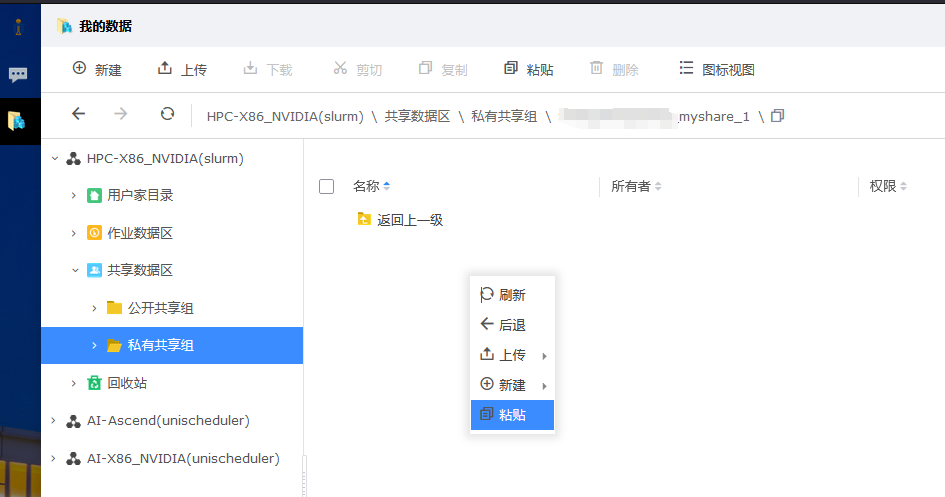
Copy the shared file to the shared directory
- Log in to other accounts in the shared group and view the shared files in the shared data area.
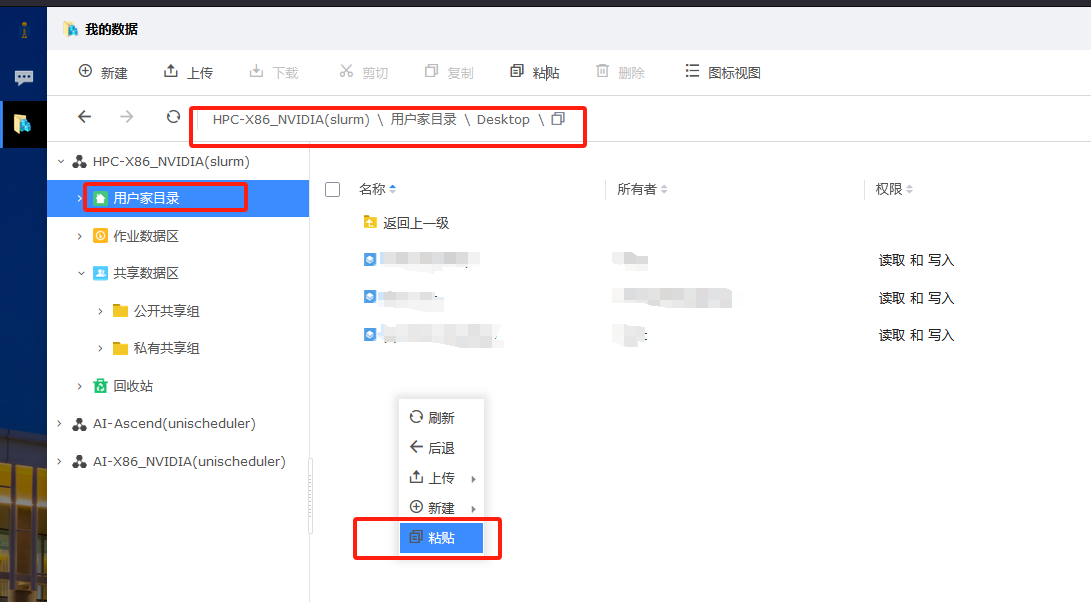
Select the desired file or folder.
Copy the shared file to the user's home directory by copy-paste.
Deleting a Shared Group
The creator of the shared group, select the shared directory in the shared data area, click the right mouse button --- delete the shared group, and delete the shared directory.