DeepSeek-Harness Agent Environment Usage Guide
Virtual Machine Information
Apply for a virtual machine environment and obtain the following information:
- Virtual Machine IP Address: [Sent via email]
- Login Username: [Sent via email]
- Login Password: [Sent via email]
Virtual Machine Environment Agent Management
agent-ctl is the unified start/stop control tool for the Hermes / DeepSeek Harness dual-stack.
Common Commands
| Command | Description |
|---|---|
agent-ctl status | View the status overview of both environments |
agent-ctl start hermes|dsh|all | Start the specified environment |
agent-ctl stop hermes|dsh|all | Stop the specified environment |
agent-ctl restart hermes|dsh | Restart the specified environment |
agent-ctl boot hermes|dsh on|off | Toggle auto-start on boot |
DeepSeek-Harness Environment Login
On first login, enter the following address in the browser address bar (Chrome browser is recommended):
https://<VM-IP>:3080
For default login credentials upon first login, please check your email or consult the HPC administrator.
Web UI Login Password Change
After logging in, it is recommended to change the default password immediately. This can be done using the command-line tool dsh-set-auth. Common commands are as follows:
| Command | Description |
|---|---|
sudo dsh-set-auth | Randomly generate a new password, keep the username (the password will be printed) |
sudo dsh-set-auth --pass 'New Password' | Change only the password, keep the username |
sudo dsh-set-auth --user admin | Change the username, generate a random password |
sudo dsh-set-auth --user admin --pass 'New Password' | Change both the username and password |
Password Rules:
- The password cannot contain a colon
:(basicauth file format restriction) - The username is limited to
^[a-zA-Z0-9._-]+$
Add a Custom Model Provider
After entering the Web UI interface, click 「Settings」→「Models」→「Add Custom Provider」 in the bottom right corner, then configure the obtained Api-url, Api-key, and Model ID information, as shown below:
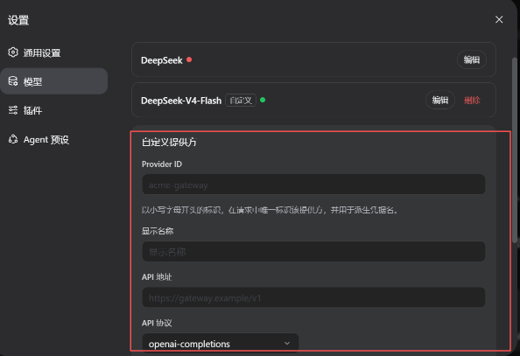
Fill in the following parameters in order:
- Provider ID: Custom identifier
- Display Name: Custom display name
- API URL:
https://aigw.hkust-gz.edu.cn/v1(example) - Api Key: Fill in the obtained Api-key information
- Model ID: Fill in the obtained Model ID information
Click the 「Add Model」 button to add the model, then click 「Create Provider」 below to complete the model service integration.
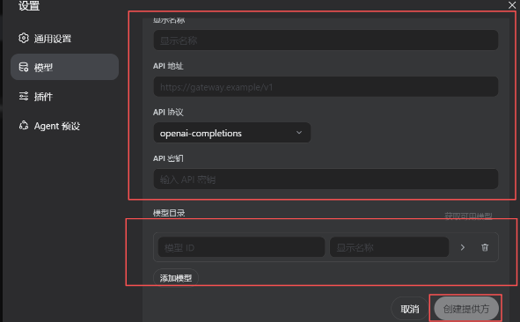
⚠️ Note: A private model service on campus has already been integrated.
Create a New Session
Click the 「New Session」 button on the left side of the Web UI to add a new session.
Add a Workspace
Click the 「Add Workspace」 button on the left side of the workspace sidebar to create a work area.
Select the Model Service
In the dropdown menu at the bottom right of the session box, select the configured model service.
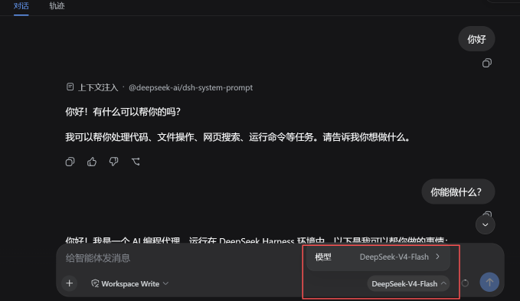
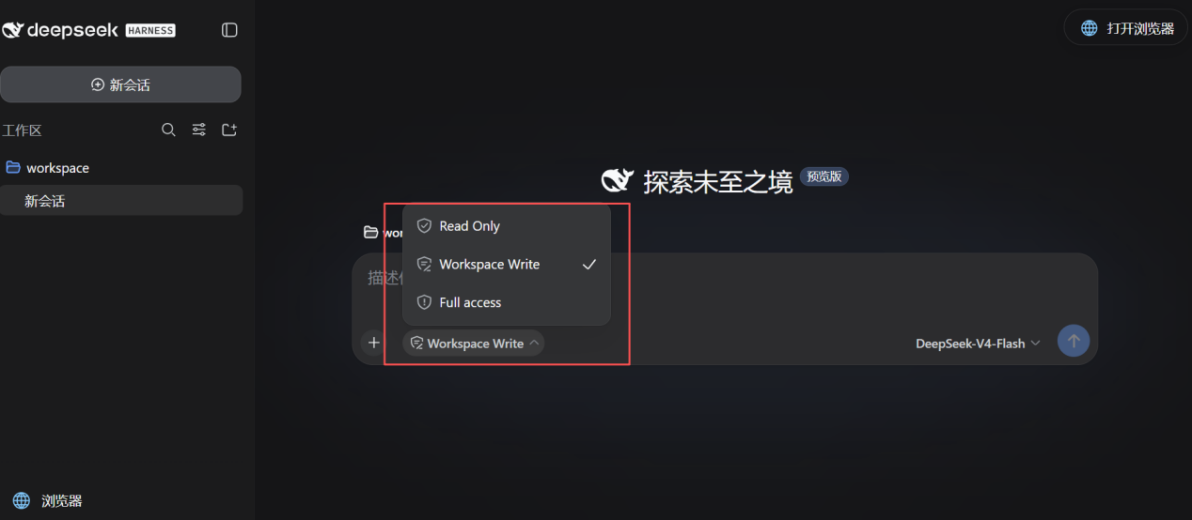
Set the Work Mode Permission Level
Select the work mode control permission at the bottom left of the dialog box. The available levels are as follows:
- Read Only
- Workspace Write
- Full access
(Optional) Use the Container Browser to Access the UI
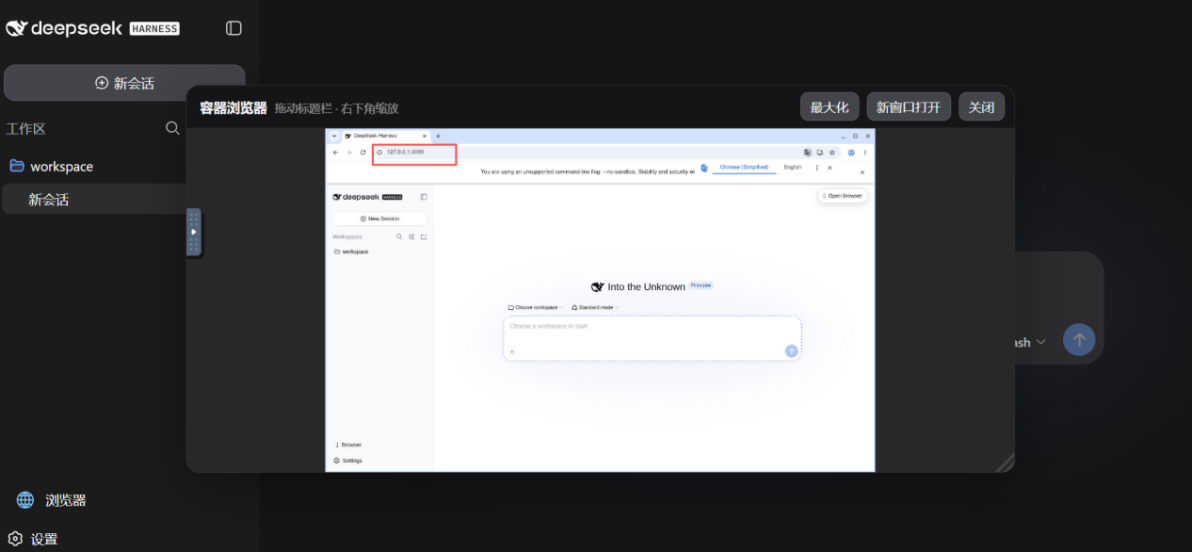
Click the 「Browser」 button on the right side of the Web UI interface to enter the container browser. Enter http://<VM-IP>:3080 in the address bar to enter the DeepSeek-Harness UI interface again for operations.